
Holy moly have I got a treat for you today! Maybe it would be kind to insert a warning here before we start, because DAMN, these chocolate fudge ice lollies are addictive. They are glorious as a fun refreshment on a hot day, but just as suitable for a movie night snack on the sofa. As they melt they only get fudgier and more delicious. Give them a go, but don’t say I didn’t warn you…
Jump to Recipe

WHY SHOULD I MAKE THEM?
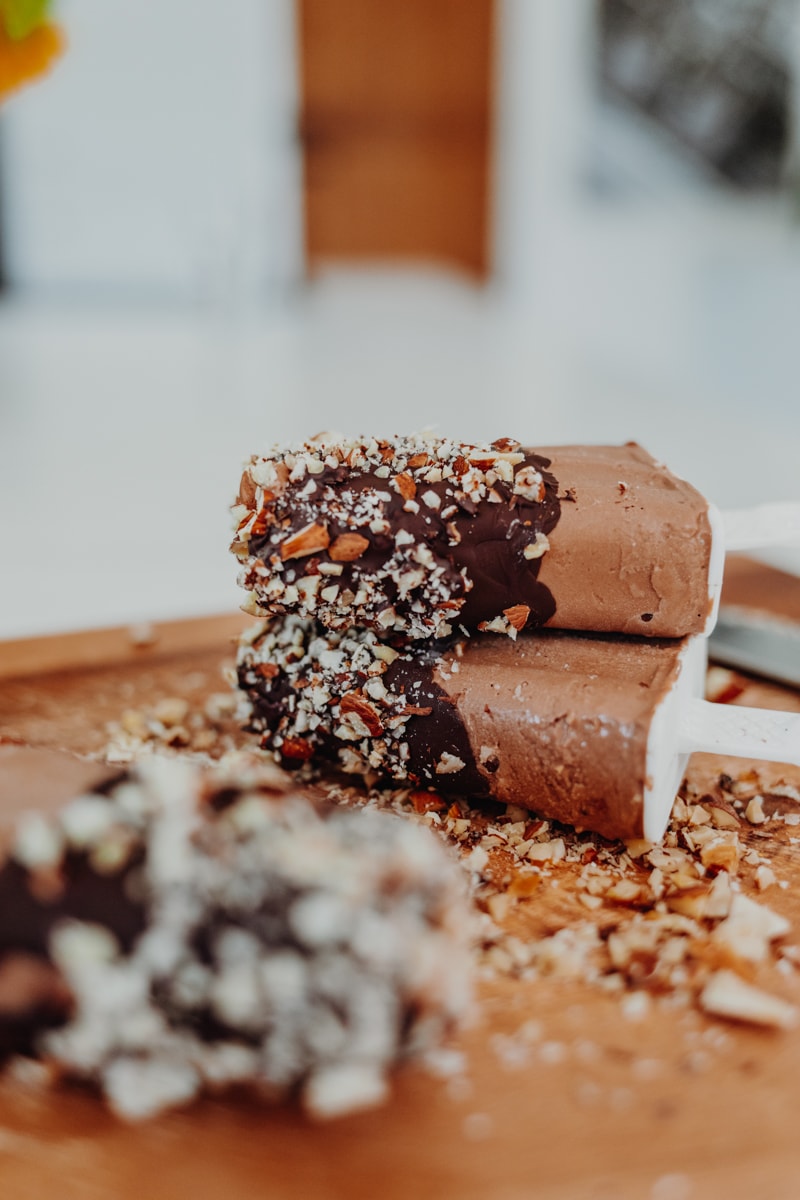
The silkiest, fudgiest choccy mousse frozen into an ice lolly, smothered with chocolate and embellished with crushed hazelnuts. Why wouldn’t you want to make them?
WHAT’S THE OCCASION?
A fun treat for a hot summers day, a casual dessert for an al fresco lunch date, getting some hidden veg into kids, or a creative way to use up any softening avocados.
HOW LONG WILL IT TAKE ME?
These lollies will take you only about 10 minutes, including decorating, but obviously they need to be frozen. You can freeze these in about 4 hours, but just to be safe, make them the day before you are planning to devour them.
IS IT DIFFICULT?
Absolutely not. In fact, these chocolate fudge ice lollies could be one of the easiest recipes I have published on GE to date. It’s amazing how a few very simple ingredients can come together to create something rather magnificent. For difficulty, it’s a 3/10.
WHAT EQUIPMENT DO I NEED?
A food processor, an ice lolly mould, a sharp knife and chopping board and a little ramekin or bowl for the melted chocolate.

TIPS FOR THE BEST CHOCOLATE FUDGE ICE LOLLIES EVER:
- Tap it out. To make sure your ice lollies are smooth and air bubble-free, give the filled ice lolly mould a good tap on the work surface before freezing. It will make them look a whole lot better.
- Use a silicone mould. I tried a variety of different ice lolly moulds whilst testing this recipe and found the flexibility of silicone to come out on top. The easiest way I’ve found to remove these lollies from their moulds is to run a small sink of warm water, dip the mould in there (avoiding submerging the top) for 30 seconds or so, before removing with ease.
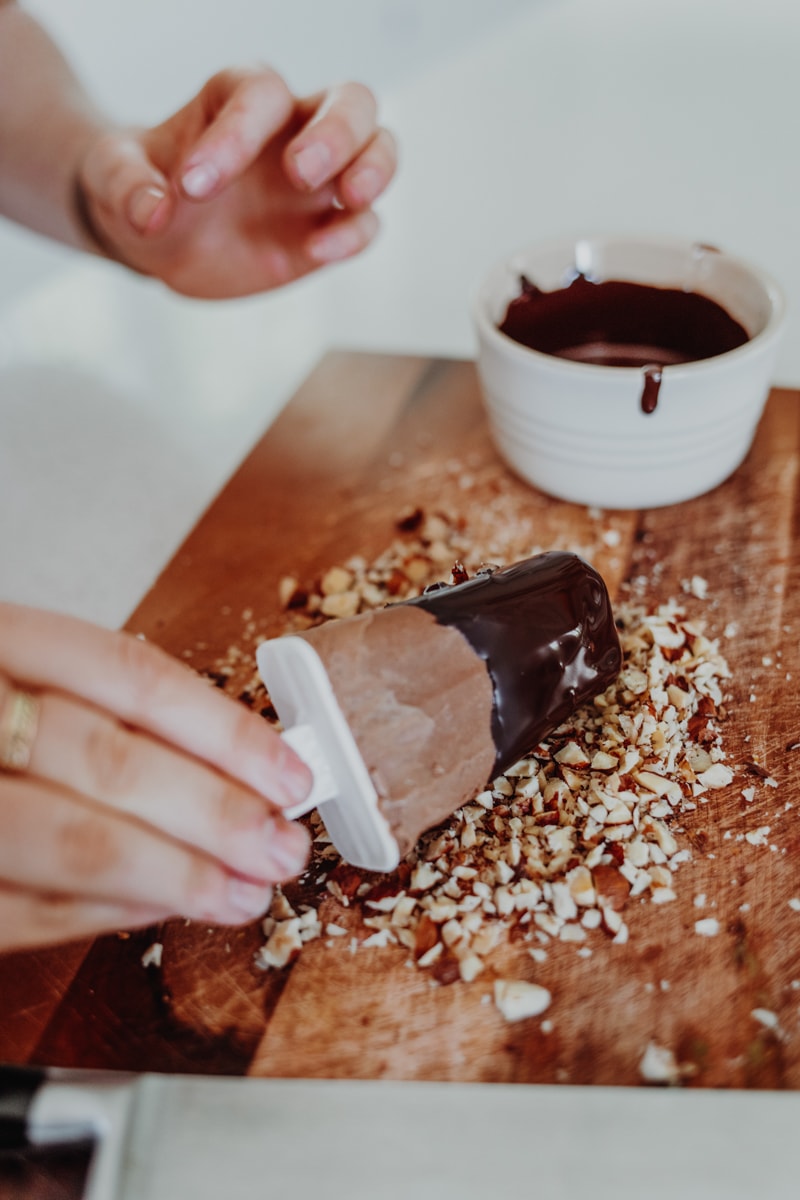
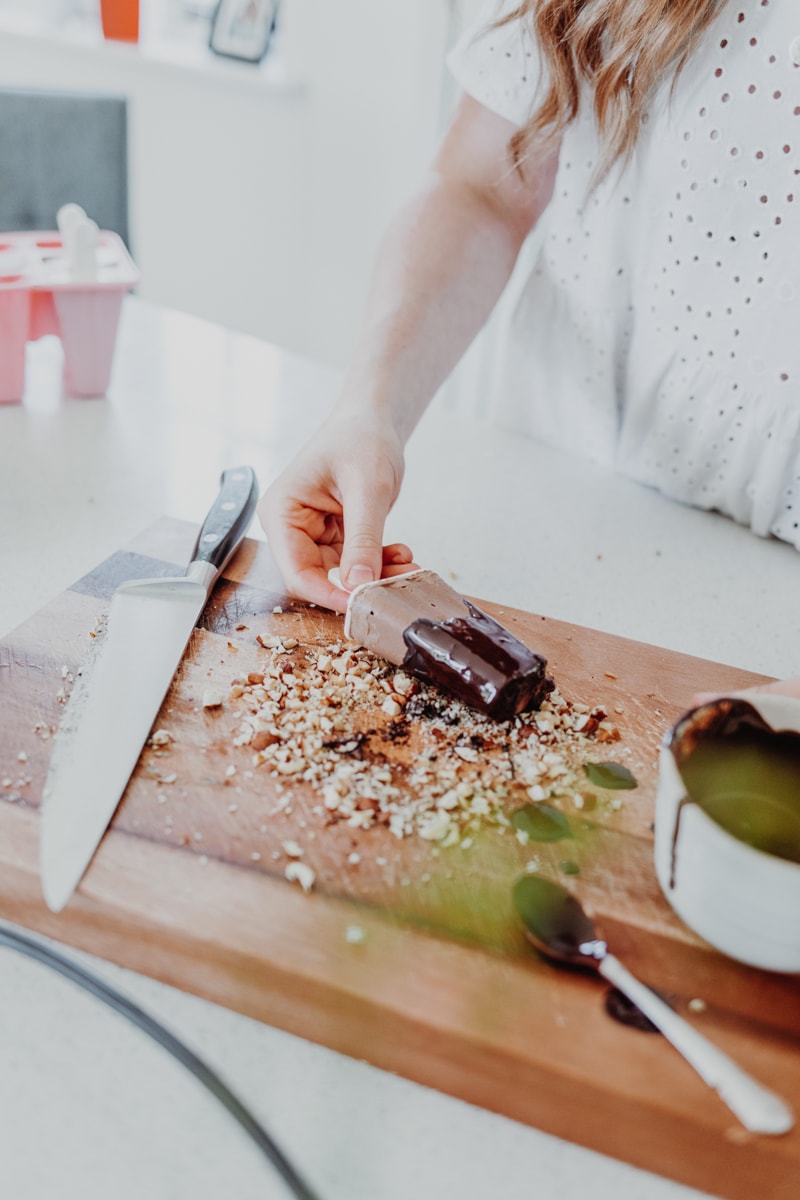
- Make them your own. Decorating these lollies is a time to get creative. I’ve used a combo of dark chocolate and hazelnuts to top here, but be as creative as you like. If making these with children it can be a fun idea to set up a few decoration stations and let them choose their own combos. Milk chocolate & almond, or white chocolate & freeze-dried raspberries are other delicious combos.

If you make these chocolate fudge ice lollies, please let me know! You can tag me in photos on IG @georgieeatsuk, use the #georgieeats or leave me a comment down below. If you want to check out my AMAZING photographer, you can do so here: @kirstyjaynerussell and here: kirstyjaynerussell.com. Keep smiling!
G x

CHOCOLATE FUDGE ICE LOLLIES
The silkiest, fudgiest choccy mousse frozen into an ice lolly, smothered with chocolate and embellished with crushed hazelnuts. Vegan & GF.
Ingredients
- 1 400 ml can coconut milk
- flesh of 2 avocados
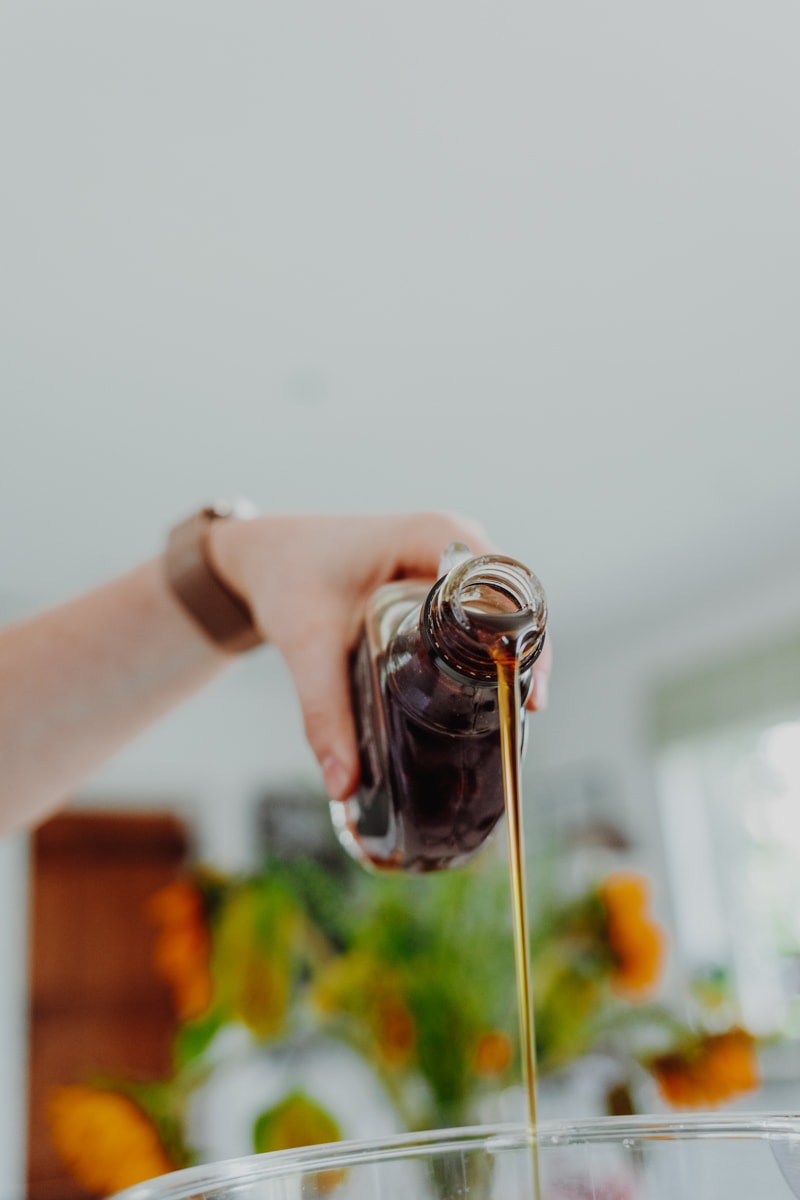
- 125 ml maple syrup
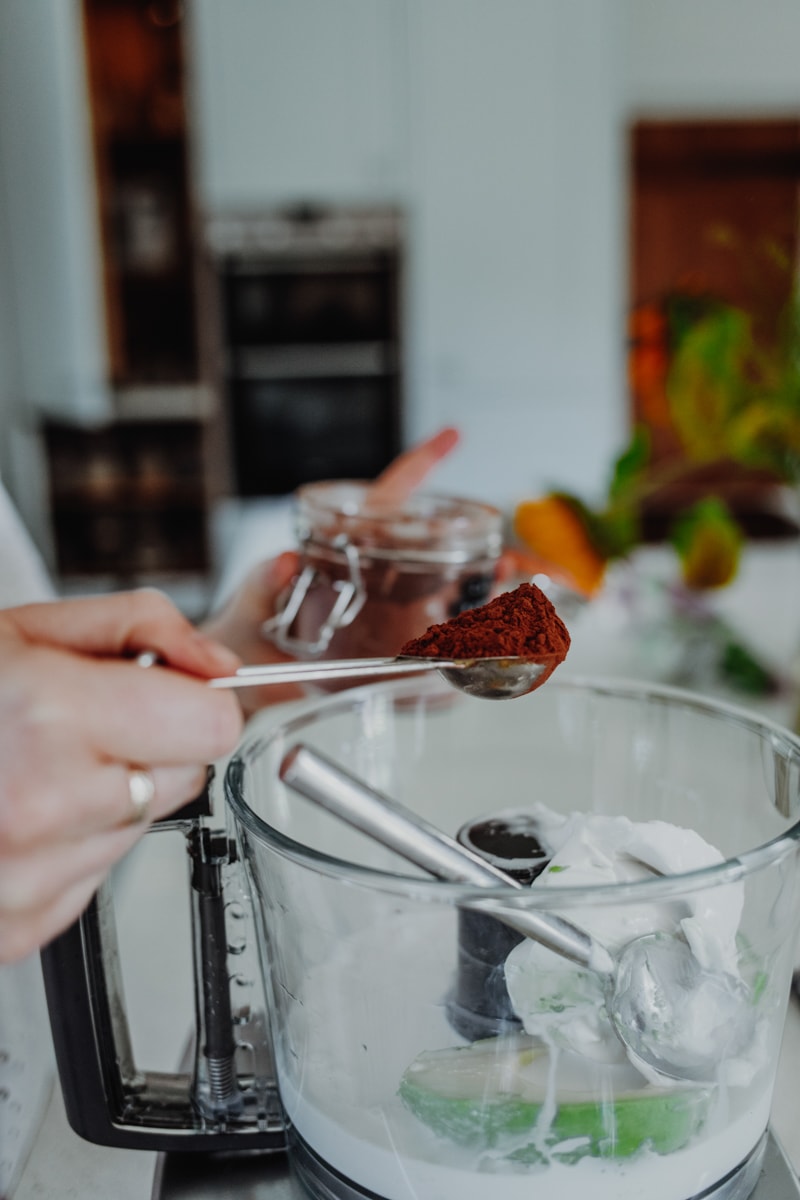
- 4.5 heaped tbsp cacao powder
- 2 tsp vanilla extract
- pinch sea salt
To decorate (optional)
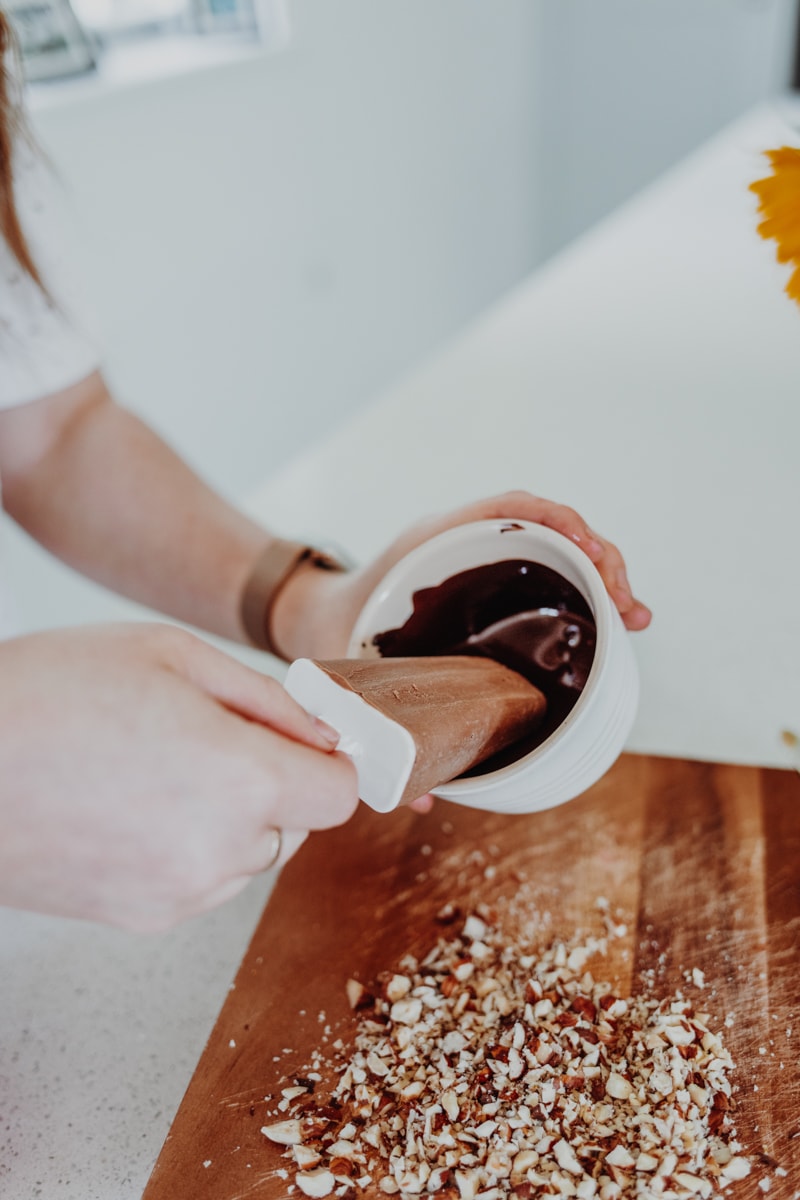
- 100 g dark chocolate melted
- 50 g hazelnuts roughly chopped
Instructions
-
Add the coconut milk, avocados, maple syrup, cacao powder, vanilla extract and sea salt into a food processor, then whizz until completely smooth.
-
Pour the mix between 6 ice lolly moulds, leaving a little room at the top to allow for expansion. Pop a stick into the top of each one, then freeze for at least 4 hours, or until frozen.
-
To decorate, dip each lolly in the melted dark chocolate and quickly sprinkle over the chopped nuts before the chocolate sets. Enjoy immediately, or return to the freezer to enjoy later.
Recipe Notes
These lollies will keep in the freezer for up to 3 months.
If you find you have leftover mix, instead of freezing it into more ice lollies, why not refrigerate it instead – it makes the most wonderful chocolate mousse.
Oh my goodness! These look absolutely delicious but, more importantly, I love the ingredients list! I am so bookmarking this recipe to make soon – they will come in handy when this summer finally decides to give us some hot weather (here in Australia). Thank you so much for sharing!
Oh yay! Please let me know if you do get to try them! x